Displaying data from Zigbee end devices on Node-RED dashboard
This blog covers the topic of extracting sensor data from received JSON strings and display it on the Node-RED dashboard. Please install both Node-RED and Zigbee2MQTT before reading further.
Installing node-red-dashboard
Open your Node-RED frontend.
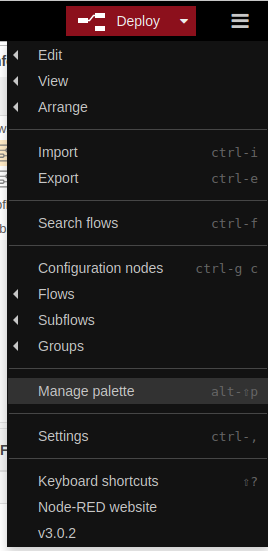
Click the button with three horizontal lines in the top right of your screen, then click Manage pallette.
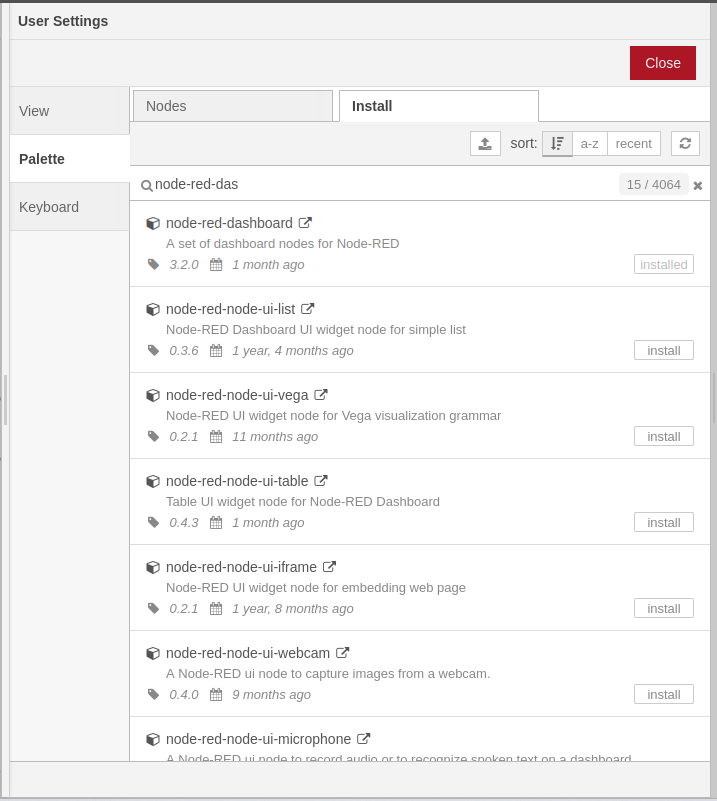
Go to the install section and search for node-red-dashboard, then install node-red-dashboard.
Now you can use the dashboard-related nodes to display data in your Node-RED frontend.
Creating the Node-RED flow
After you run your Node-RED and go to you Node-RED frontend, you will be able to create your Node-RED flow.
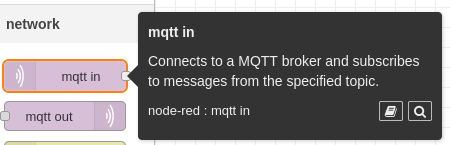
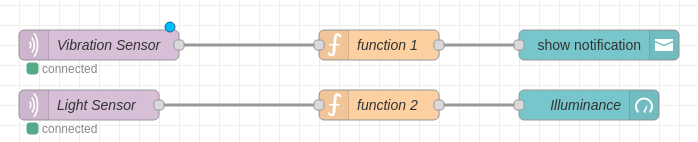
The nodes that we will use to subscribe to the MQTT broker used by Zigbee2MQTT is the mqtt in nodes.
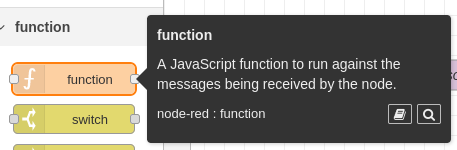
Then we are going to process the JSON recieved from the mqtt in nodes with the function nodes.
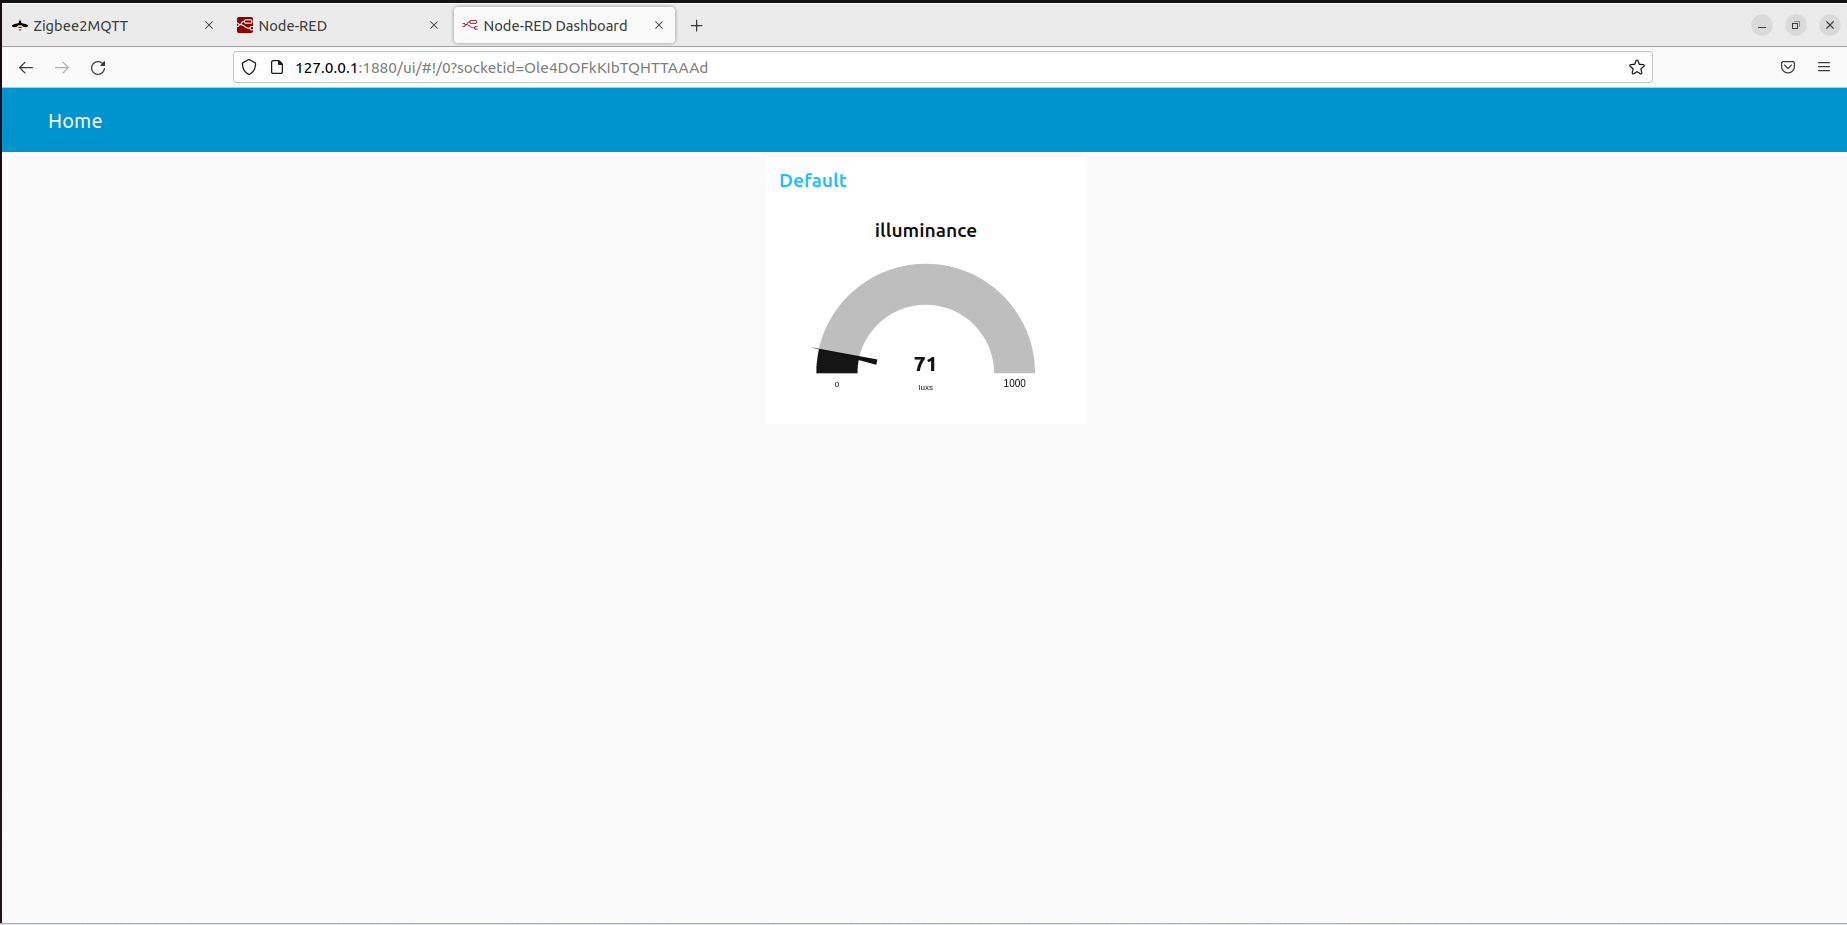
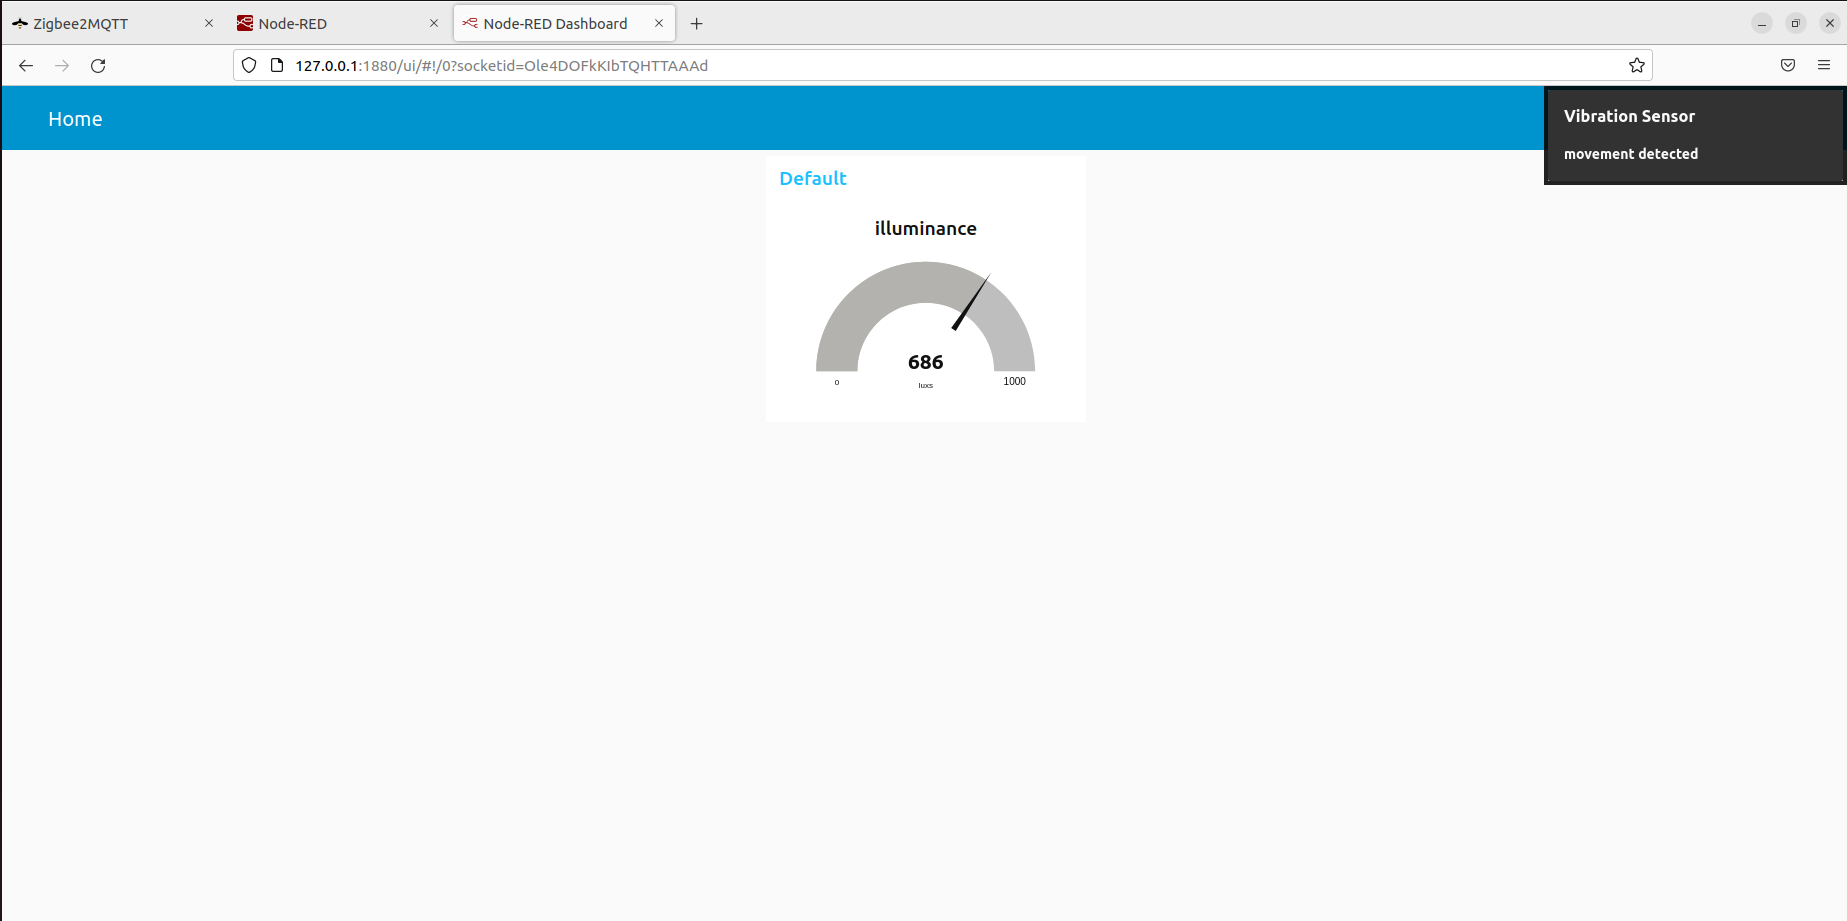
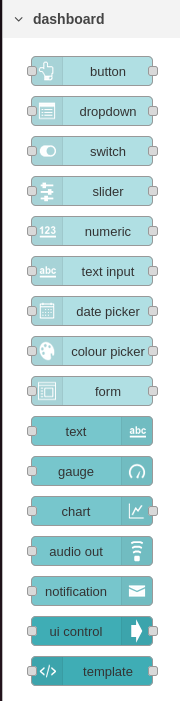
Using the processed messages from the functions node, we can display them with the nodes in the dashboard section.
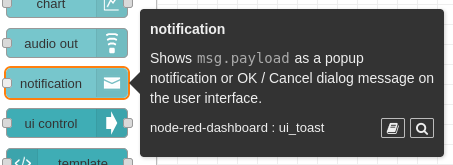
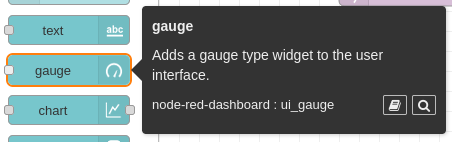
For the demonstration we are going to use a notification node to display information from a vibration sensor and a gauge node to display information from a light intensity sensor.
Connect each mqtt in node’s output to the corresponding function node then connect the output of the function that connect to the vibration sensor to the notification node and connect the output of the function that connect to the light intensity sensor to the gauge node.
Setting up each mqtt in node’s properties
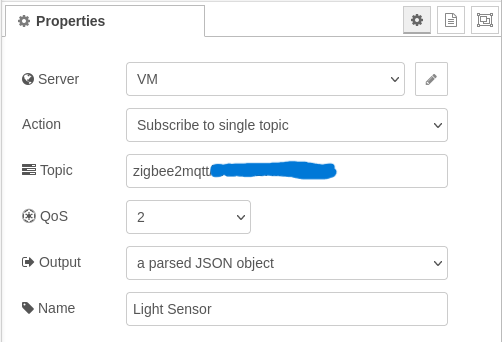
Set the topic property to the same topic that the Zigbee end device uses to publish information to the MQTT broker, usually zigbee2mqtt/(The device’s IEEE address)
Set the output property to JSON object.
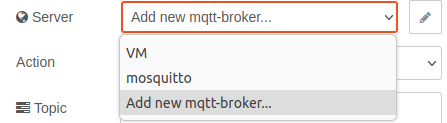
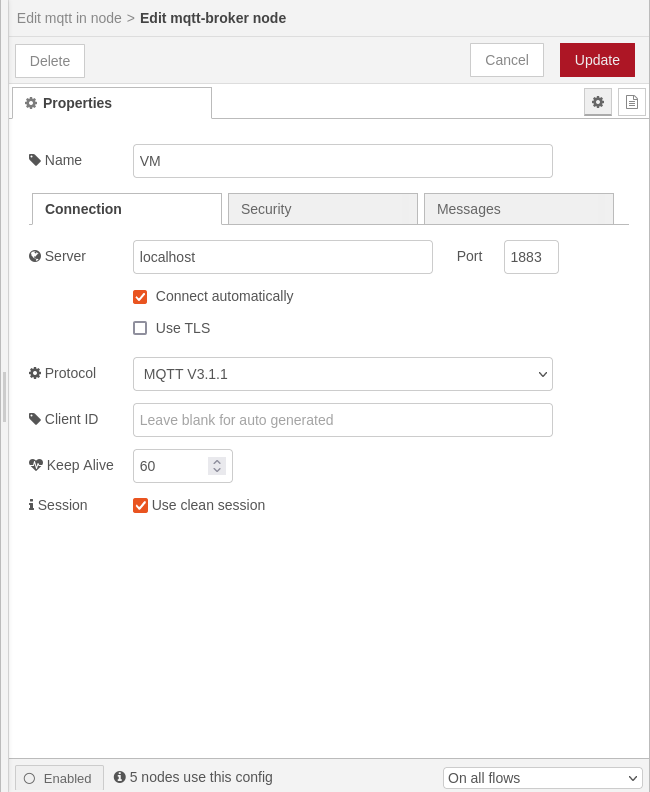
Now we have to let Node-RED knows what MQTT server are we going to subscribe to. Do this by adding a new mqtt broker.
After selecting the Add a new MQTT broker option, click the pencil button.
Set the server property to the server that hosts the MQTT broker.
Setting up each function node’s properties
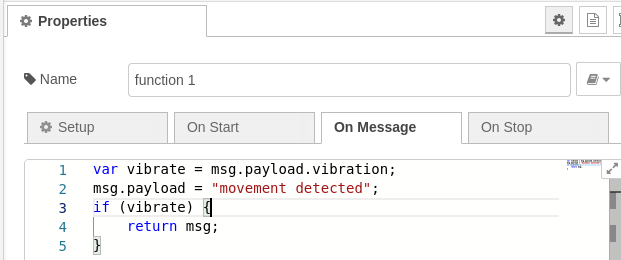
The function1 node extracts the vibration’s value from the JSON recieved from the vibration sensor.

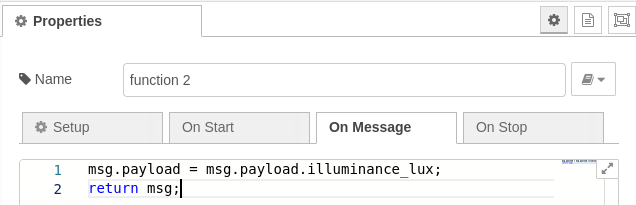
The function2 node extracts the illuminance_lux’s value from the JSON recieved from the light intensity sensor.

Setting up gauge node’s properties
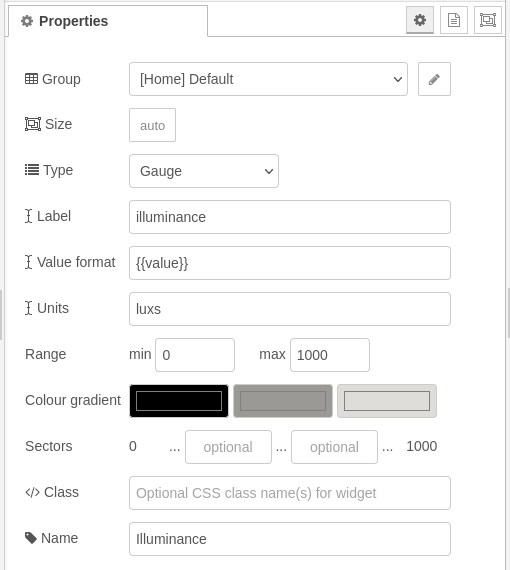
We have to create a group for the gauge. Do this by selecting the Add new dashboard group option, then press the pencil button.
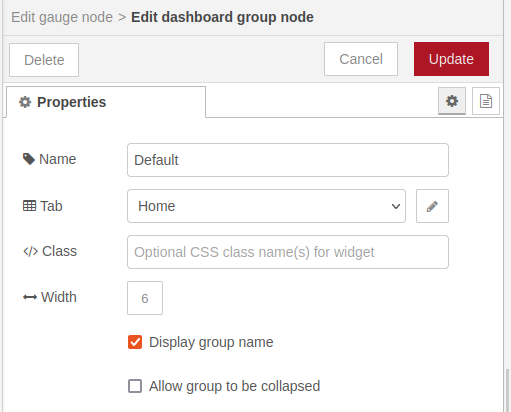
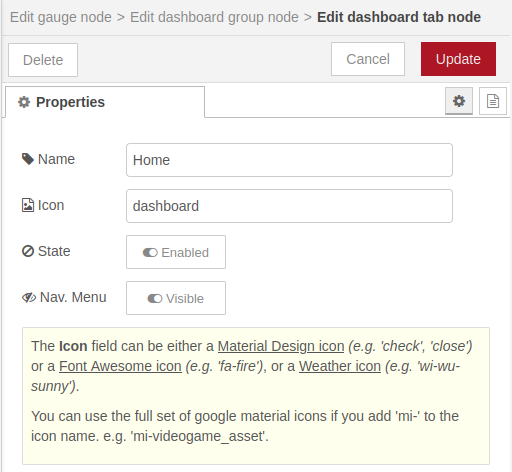
We also have to create a tab for the group. Do this be selecting the Add new dashboard tab option, then press the pencil button.
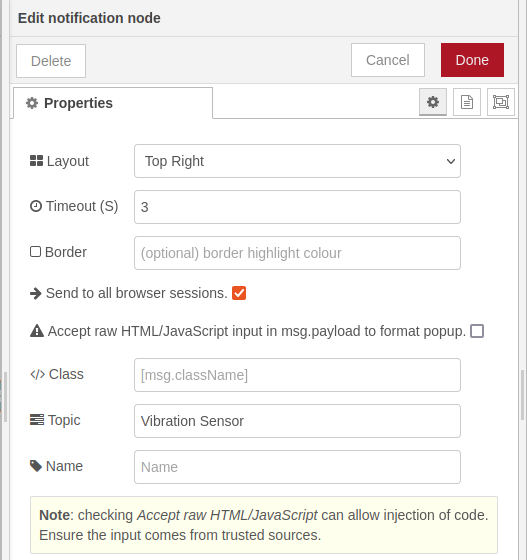
Setting up notification node’s properties
Deploying the flow
After you finish editing your Node-RED flow, press the Deploy button located on the top right of your screen.

Now you can go to your Node-RED dashboard at (Path to your Node-RED frontend)/ui/ .